voice (603)
924-1321
fax (888) 777-0875
toll-free (888) 777-0876
Quality Software and Related Products for Visual Learners since 1998
Visual Schedules
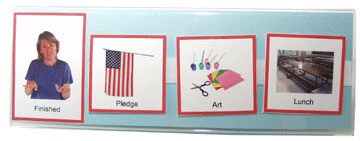
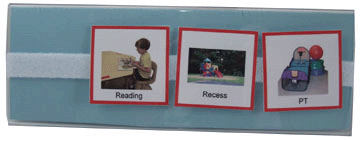
Like token boards, visual schedules help a student to anticipate what is coming next, and see what has been completed. The sample schedule below shows a typical school day, with remaining classes on the front, and finished classes on the back. As each class is completed, the student moves the card to the back.
|
|
 |
|
Front side of Schedule, showing which classes are left |
Back of the schedule, showing which classes are finished |
How to Create Visual Schedules
Supplies you will need
Most of the following supplies are available at an office supply store:
- Velcro dots and a fuzzy strip of velcro
- Laminating sheets, clear contact paper, or card stock
- 1 piece of construction paper
- Plastic name holder (found in literature display section of office store)
- Scissors
- Glue Stick
- Picture This... Pro and School Routines and Rules (to create the sample schedule)
To create the sample school schedule, open the School Routines and Rules CD and select the 12 per page grid. Choose the classes that your student attends, and print them out. Either laminate the cards, glue them to card stock, or print them on card stock. Stick a prickly velcro dot to the back of each card.
Next, print a copy of the "finished sign" located in the speech folder of the School Routines and Rules. Glue the "finished" picture to the bottom left corner of the colored paper. Cut the colored paper so that it fits into the name holder, and slide the paper into the holder. Next, stick a strip of fuzzy velcro to the front and back sides of the name holder. (Align the strip in the center)
At the beginning of the day, put all of the classes on the front, and move them to the back as they are completed. If necessary, you can make separate morning and afternoon schedules.
Variation of the School Schedule
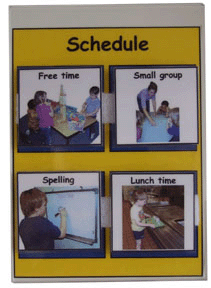
Of course, there are various different ways that you can create schedules, another example is shown below.
|
|

